Jump to section
- Requirements
- Installation
- License Registration
- Image Hopper Field
- Post Image Hopper Field
- Notification Attachments
- Browser Support
- Add-ons Support
- Gravity PDF
- Gravity Flow
- GravityView
- GravityView Import Entries
- WooCommerce Gravity Forms Product Add-on
- Gravity Perks Nested Forms
- Gravity Perk Media Library
- Gravity Forms Advanced Post Creation
- Gravity Forms + Custom Post Types
- Gravity Forms Dropbox
- Gravity Forms Zapier
- Gravity Forms User Registration Add-on
- Slim Image Cropper
- Translations
- Developers
Requirements
- PHP 5.6+
- WordPress 5.2.0+
- Gravity Forms 2.4.0+
The plugin cannot be used without Gravity Forms.
Installation
After completing the checkout process you will be redirected to the Purchase Confirmation page. Here you will be able to download your PDF invoice, access the plugin support page, copy your license key, and download the plugin zip file.

Once you’ve downloaded the zip, login to your WordPress Admin Area and navigate to Plugins -> Add New. When the page loads, click the Upload Plugin button at the top of the page (right next to the page title) to bring up the file selector. Choose the zip file you just downloaded and click Install Now. If the installation is a success, click the Activate Plugin button to enable Image Hopper on your website.


Note: if your browser auto-extracts zip file, and you’re having trouble uploading the file to your website, you may need to temporarily deactivate this feature and download the plugin again.
If you purchased any of the license packages that include the Advanced Image Editor, please refer to these instructions for installation and configuration of that feature.
License Registration
It’s important to activate your license key on your site(s) so you can receive WordPress one-click updates and support by the Image Hopper team.
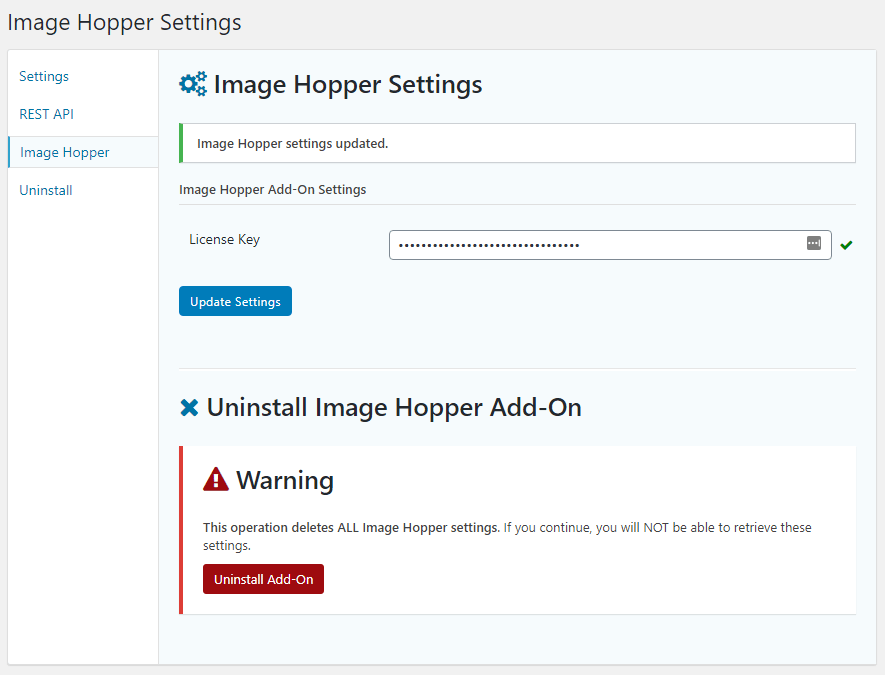
To do this, after activating the plugin you can click the Settings link shown next to the Deactivate link on the Image Hopper item shown in the plugins list. You can also reach the settings page by navigating to Forms -> Settings -> Image Hopper.
Copy your license key to the License Key setting and click the Update Settings button to save. If successful you will see a tick icon show up next to the input area. If there is a problem a cross will be shown.
You can deactivate and remove your license key from the site by deleting it from the License Key setting and saving.

Image Hopper Field
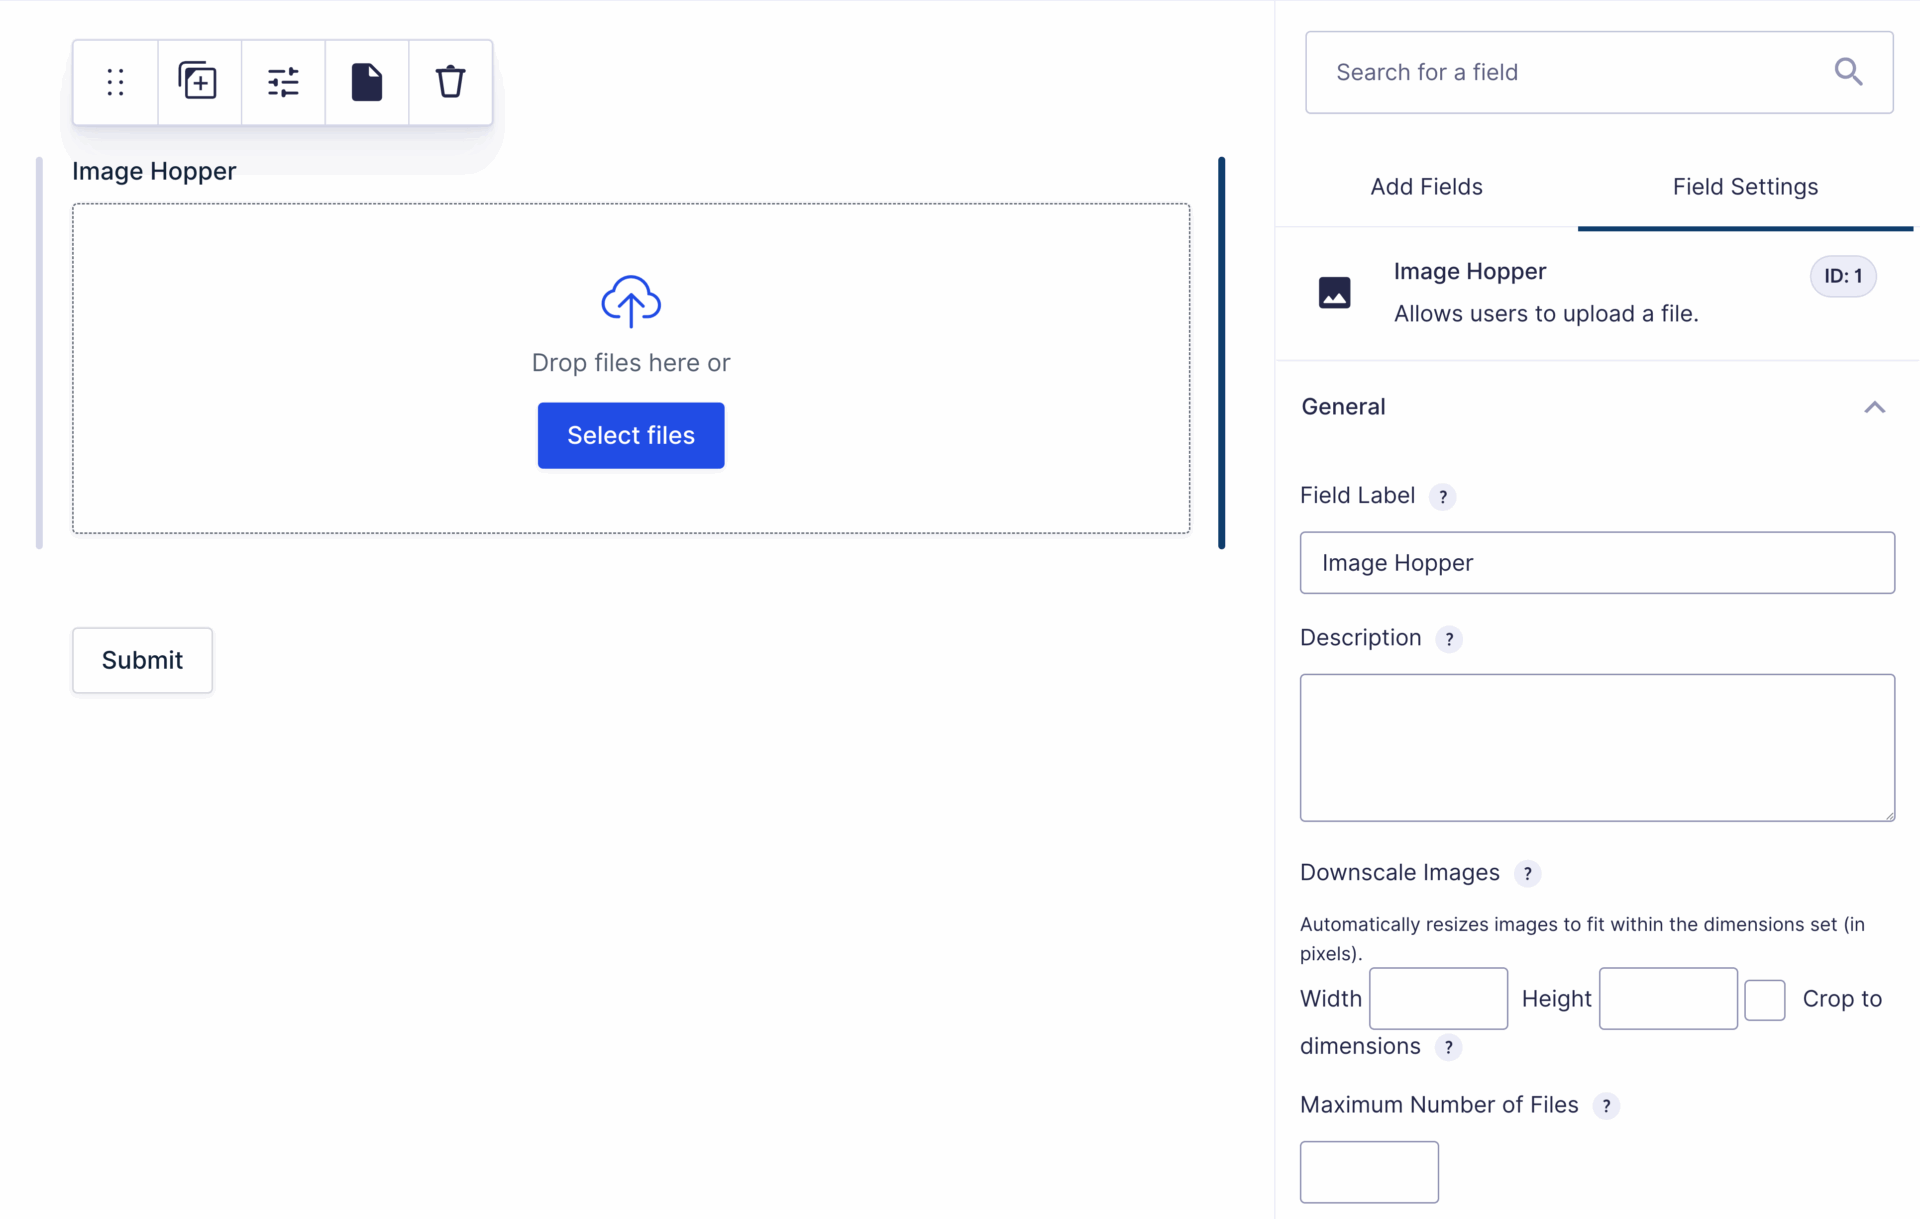
The Image Hopper field is available under the Advanced section of the Gravity Forms Editor. The field is very versatile and you can:
- Allow multiple images to be uploaded in a single Image Hopper field
- Add multiple Image Hopper fields to a single Gravity Form
- Automatically downscale images (reducing the image size) to fit within the width/height you set, and optionally crop to the dimensions set
- If you’ve enabled the crop feature, you can automatically upscale images smaller than the dimensions set (ensures all images are the same size, but does effect overall image quality)
- Set a maximum number of images that can be uploaded per Image Hopper field
- Set the maximum file size allowed to be uploaded to the server (calculated using the downscaled image size and not the original file size)
- Set a minimum size for all images, preventing users uploading small images
- Set a minimum size warning for all images, which shows an alert if users upload an image below the threshold you set
- Reorder images using drag and drop/keyboard
- Set the image output quality for JPG/JPEG images
- Automatically rename uploaded images
- Automatically rotate images based on their EXIF data. This is great for mobile and tablet uploads, where devices are usually rotated when taking photos.
- Include Image Hopper fields on any page in your form
- Use Image Hopper with the Save and Continue feature
- Automatically include uploaded images as attachments in your Notifications
- Upload all common image file types: JPG/JPEG, GIF, PNG, BMP, HEIC^ (for iOS devices), WebP (if running WP5.8+), and AVIF (if running WP6.5+)
^ HEIC images are automatically converted to JPG
Field Settings
The Image Hopper field supports many of Gravity Forms common field settings, including:
- Field Label
- Description
- Rule: Required
- Field Label Visibility
- Description Placement
- Custom Validation Message
- Custom CSS Class
- Admin Field Label
- Visibility
- Conditional Logic
For information about these common field types please refer to Gravity Forms documentation.
Custom Field Settings
The following additional settings are available for the Image Hopper field:
Downscale Images
With modern phones and cameras producing higher quality images, users are more likely to be uploading huge images to your server and this can easily become a storage, bandwidth, and backup nightmare. While the standard File Upload field in Gravity Forms allows you to set a Maximum File Size, it puts the burden on the user to optimize the images prior to upload. With Image Hopper, all you need to do is set a conservative downscale Width/Height and the image(s) will be automatically processed in the user’s browser before uploading. It’s a win-win for everyone involved!
If a user uploads an image that is already below your downscale size it will not be automatically scaled up (see Upscale to Crop Dimensions).
Crop to Dimensions
By default, the Downscale Images setting will respect an image aspect ratio. If you instead want to ensure the image is the exact size you’ve set enable the Crop to Dimensions setting and those images will be automatically resized and cropped to suit. If an image is smaller than the crop dimensions it won’t get processed automatically. But you can set a Minimum Image Size that matches your crop dimensions to prevent users uploading small images, or enable the Upscale to Crop Dimensions setting to force uniformity on all uploads (be aware upscaling images affects the overall image quality).
This feature can be enabled with or without the Image Editor. When the Image Editor is disabled, the image will be automatically resized and cropped to the set dimensions, using the middle of the image as the crop centre point. If the Image Editor is enabled, the user can adjust the positioning of the image in relation to the fixed crop area to change the focal point.
Maximum Number of Files
You can specify the maximum number of images that can be uploaded to an Image Hopper field. You can leave this setting blank for unlimited files, just bear in mind the actual number of files permitted may be limited by your server’s specifications and configuration.
If only one image is allowed on the field, the image will automatically be displayed at full width (up to a maximum height of 800px) inside the Image Hopper container.
Output Quality
Optimize images even more by setting the output quality of JPG/JPEG images. Set to 0 for the worse possible quality, and 100 for the best. If you don’t set a value, Image Hopper will use the browser defaults.
Maximum File Size
Specify the maximum file size in megabytes allowed for each of the files. When used in conjunction with the Downscale Images setting, the file size is checked after the image has been downscaled.
Minimum Image Size

Images smaller than the threshold you set can be prevented from being uploaded by enabling the Enable Minimum Image Size setting under the Advanced tab/section of the Image Hopper field. Set a specific threshold and Image Hopper will automatically stop the uploading process if users attempt to upload images that have a width or height smaller than what you have defined.
As an example, if you set the dimensions to 500px width and 500px high and a user uploads an image that is 200x200px an error would be shown and the image won’t be uploaded. The same is true if a user uploaded an image that is 600px wide and 400px high. Both width and height need to be individually larger than the associated minimums you set for it to be uploaded.
Minimum Image Size Warning

If you would like to alert the user that the image they are uploading might be too small, but still allow the upload, then enable the Enable Minimum Image Size Warning setting under the Advanced tab/section and set an appropriate width and height. If a user uploads an image smaller than the threshold, the warning will be shown below the Image Hopper field.
Note: ensure the Downscale Image width and height is larger than the threshold you set for the minimum image size warning, otherwise all images will be shown the warning regardless of what the original size was.
Upscale to Crop Dimensions
Located in the Advanced section of the Image Hopper field, this setting is only available if you’ve also enabled Crop to Dimensions. When toggled on, it ensures the uploaded image will get scaled up to the width and height specified in Downscale Images when it has smaller dimensions. While this does ensure all uploaded images have uniformity, this will save an image that has a noticeable drop in image quality.
Rename Upload
Located in the Advanced section of the Image Hopper field, this setting allows you to automatically rename uploads, and set the file path – which is relative to the form’s current upload directory (/wp-content/uploads/gravity_forms/{id}-{hash}/). Merge tags are supported, and you can reference the original filename using the {name} tag. If a file with the same name and extension already exists in the directory, an incremental counter is added as a suffix, until unique.
File renaming occurs during form submission, and not during the initial upload.
Valid inputs include:
{date_created:format:Y-m-d}-{name}– prefix all filenames with the year, month, and dayUploads– use a static filename. Multiple files with the same extension will have a counter added eg.Uploads1.jpgUploads2.jpgUploads3.jpg/{entry_id}/{name}– store individual entry uploads in separate folders, using the default filename provided by the user/{Category:2}/{date_created:format:Y}/Report-{entry_id}– organize uploads in folders by category and year, then rename with a static value and entry ID.
To save uploads to a path outside of Gravity Forms default /wp-content/uploads/gravity_forms/{id}-{hash}, you will need to implement the gform_upload_path filter. Be aware that secure file URLs cannot be used if you use the gform_upload_path filter.
Convert File Upload Field to Image Hopper
You can convert an existing Single or Multiple File Upload field to an Image Hopper field. This is useful if you’ve existing forms/entries that you’d like to add Image Hopper features to, as there is no data loss, and you don’t have to reconfigure any of your confirmations, notifications, or form feeds.
After choosing a File Upload field in the form editor, a new “Convert” image icon will be displayed in the toolbar:

When you select the “Convert” button the field will automatically switch to an Image Hopper field, and you can configure accordingly. Save the form when you’ve done with your changes.

If you have a problem with Image Hopper, you can easily convert the Image Hopper field back to a Multi File Upload field by following the same process.
Note: When converting an Image Hopper field to a File Upload field, the “Enable Multi File Upload” setting is always enabled (even if the field was originally a Single File Upload field). This cannot be disabled, but setting “Maximum Number of Files” to 1 will give similar results.
Form Theme
Image Hopper 2.9+ introduced support for Gravity Forms Themes, and when you select a non-default theme (like Orbital) the Image Hopper field will output with an alternate design which integrates seamlessly with the available Theme Settings. The new UI will also be used for Gravity Forms Conversational Forms add-on.
Reorder Images
After images have been added to the Image Hopper field they can be reordered with a mouse or touch-sensitive device by dragging images around the screen. It’s also possible to change the order with the keyboard by gaining focus on an image and using the arrow keys or “J” and “K” keys.
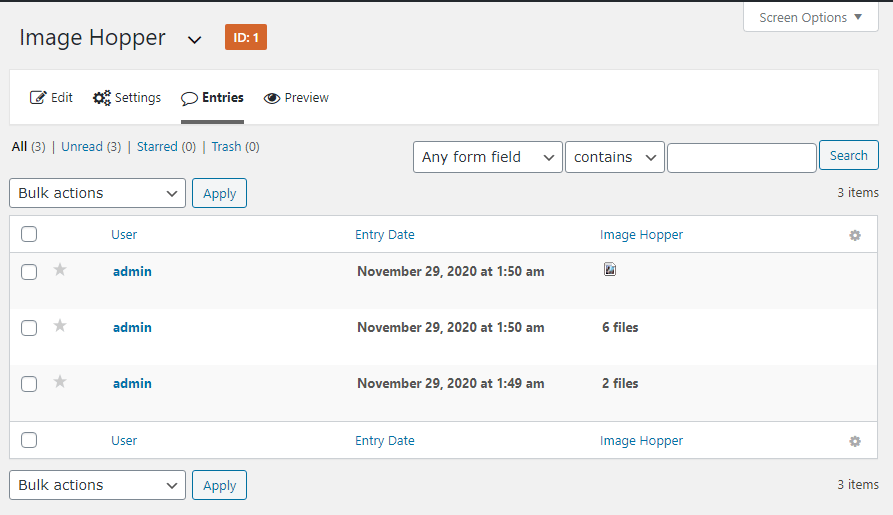
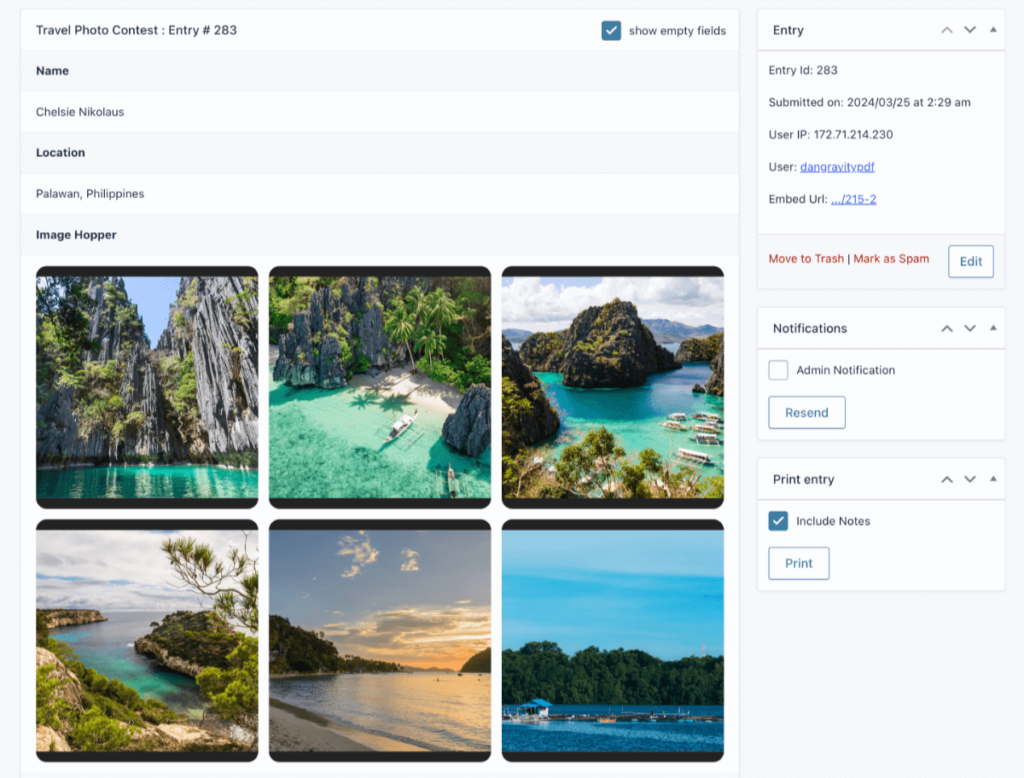
Viewing Entry
After the form has been submitted, the Image Hopper field will display the number of uploaded images in the Entry List and the actual images on the Entry Details page.
Editing an Entry
When viewing an entry, you can edit it to add, remove, or reorder any Image Hopper images. If you have enabled the Image Hopper Editor functionality, you can edit images using the available editing tools. To enable the Editor, refer to the Image Hopper Editor documentation.
Save and Continue
Image Hopper is fully supported when using Gravity Forms Save and Continue feature. Provided the images are successfully uploaded during the initial form submission (and don’t show an error), they will be automatically rehydrated when the recovery link is used.
Note: if the recovery link is used and an image is then deleted without generating a new recovery link, it can put the Image Hopper into an invalid state if the original recovery link is accessed a second time. The image showing an error can either be ignored (the invalid image will be discarded during form submission) or deleted to proceed.

Export Entries
When the Image Hopper field is included in a CSV export of your entries it will include the full URL to each image, separated by a space/comma/space ( , ). If only a single image is uploaded the separator will not be included.
Merge Tags
Image Hopper has its own individual field tags, but also integrates nicely with Gravity Forms {all_fields} merge tag.
Field Tag
Usage
{Field Name:2:modifier}Without any modifiers, and when in an HTML-output context, all images will be displayed on screen using <img /> tags. If in a text-output context the output is the same as using the :url modifier.
Modifiers
- :url
Denotes that the output should show the plain-text secure/masked URL(s) of the uploaded images. If the merge tags is output in a HTML context, each URL will be displayed on a new line. If in a text context the URLs are separated by a comma (,) - :raw
Denotes that the output should show the plain-text direct URL(s) of the uploaded images. If the merge tags is output in a HTML context, each URL will be displayed on a new line. If in a text context the URLs are separated by a comma (,) - :count
Will output the total number of images that have been uploaded to the field. This is useful when combined with a Number or Product calculation field to do per-image billing.
All Fields Tag
When using the {all_fields} tag (or its variants) in an HTML-output context, all images will be displayed on screen using <img /> tags. If in a text-output context the output is the same as using the :url modifier.
Post Image Hopper Field
Along with the standard Image Hopper field, there is an additional Post Image field powered by Image Hopper, which allows you to easily integrate Image Hopper with Posts and your Media Library. You can find the Post Image field under the Post Fields section of the Gravity Forms Editor.
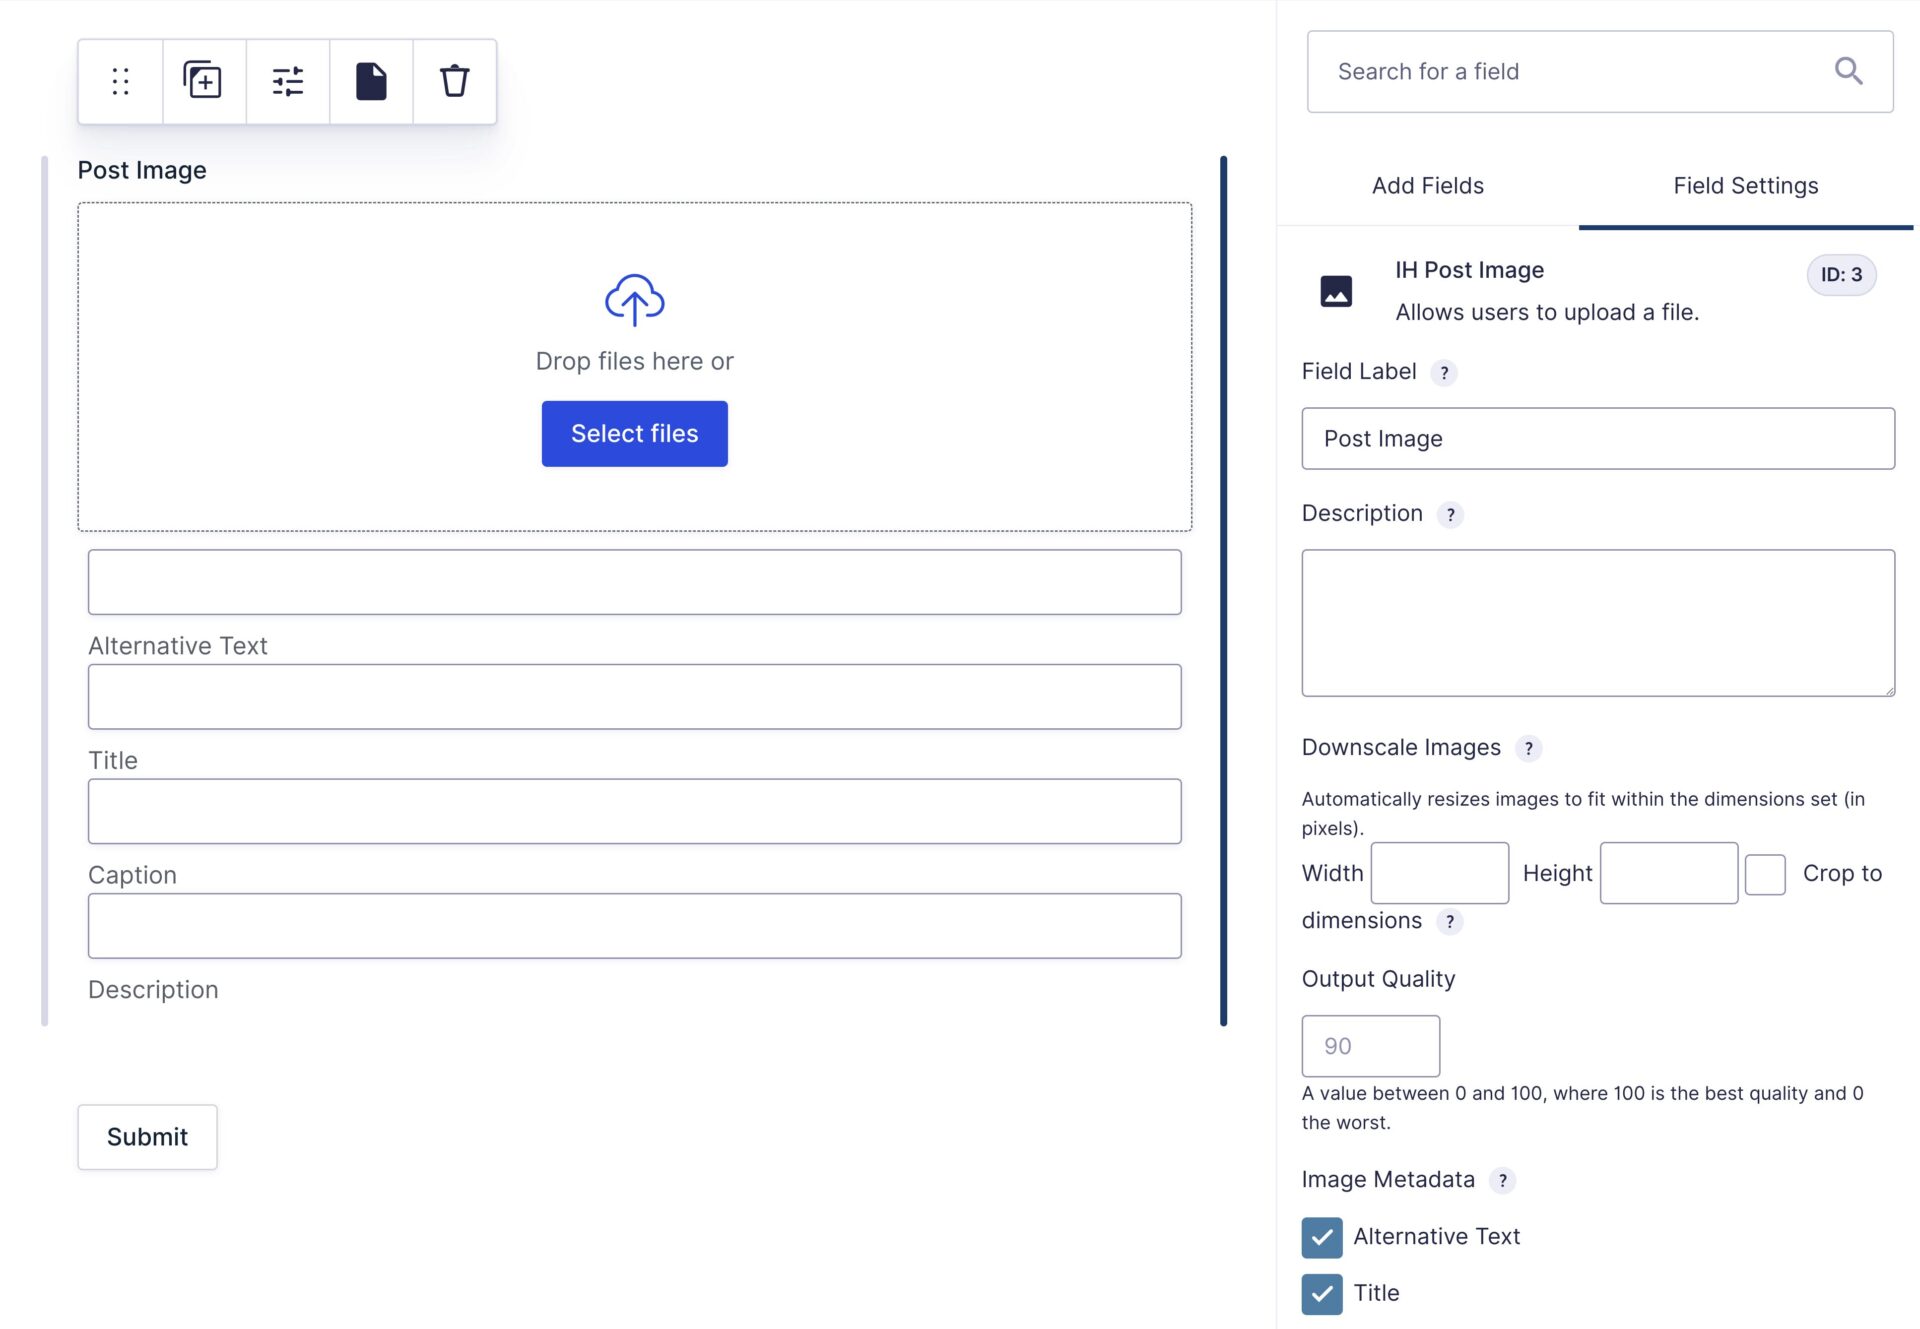
The new Post Image field supports most of the same features of the standard Image Hopper field, but, to match Gravity Forms standard Post Image field, only one image can be uploaded per Post Image field.
Custom Field Settings
This field type supports all the same settings as the standard Image Hopper field (minus how many images can be uploaded). This includes Downscaling Images, Output Quality, and the Image Editor functionality (if you’ve that add-on installed). In addition, two new settings are available:
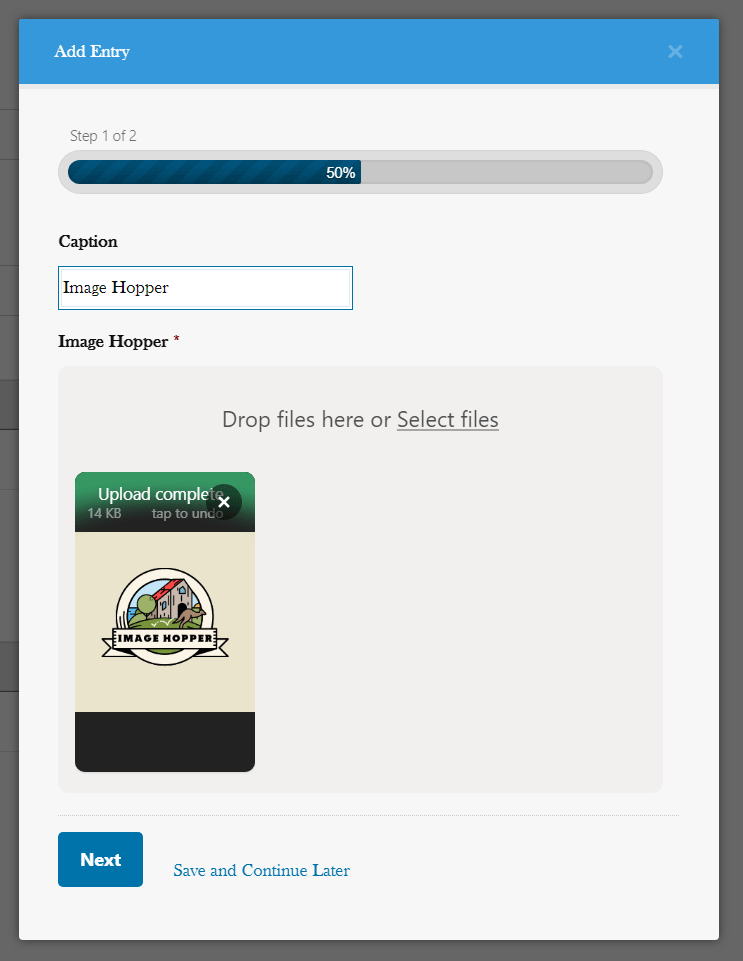
- Image Metadata – Enable users to enter additional information about the uploaded image, including title, caption, and description.
- Featured Image – set the image as the post’s Featured Image.
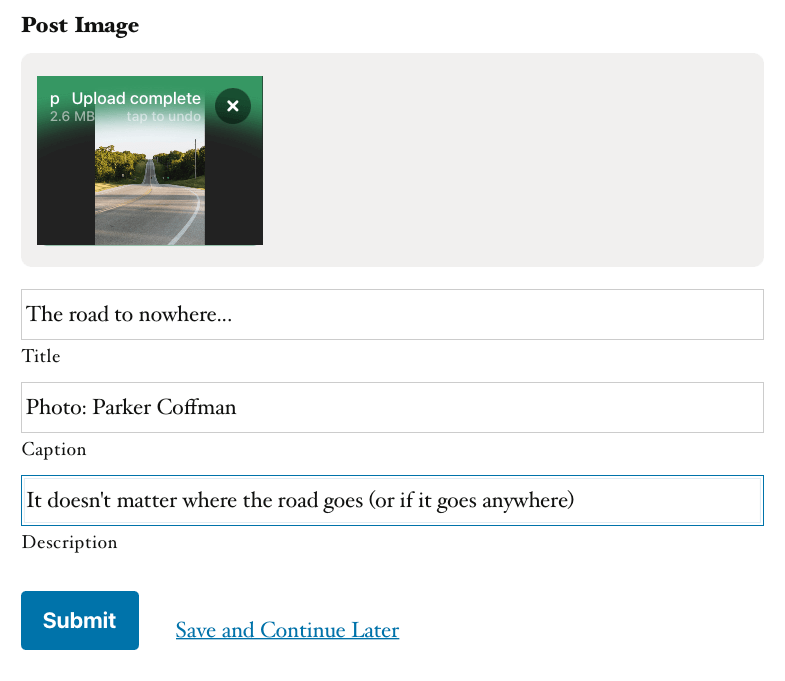
When a form is successfully submitted, a new Post is created with your Post fields and any Image Hopper Post Images will be automatically added to the media library and (optionally) set as the Post’s feature image.
Rename Upload
The Post Image field supports file renaming, but for compatibility reasons the default file path cannot be changed, and will be ignored.
Convert Post Image Field to Image Hopper
You can convert an existing Post Image field to an Image Hopper field (or vise versa). This is useful if you’ve existing forms/entries that you’d like to add Image Hopper features to, as there is no data loss and you don’t have to reconfigure feeds.
After choosing a Post Image field in the form editor, a new “Convert” image icon will be displayed in the toolbar:

Upon selecting the “Convert” icon, the field will be automatically switched to an IH Post Image field, and you can configure accordingly. Save the form when you’ve done with your changes.

You can also convert an existing IH Post Image field back to a standard Post Image field by selecting the “Convert” file icon.
Form Theme
Image Hopper 2.9+ introduced support for Gravity Forms Themes, and when you select a non-default theme (like Orbital) the Image Hopper Post field will output with an alternate design which integrates seamlessly with the available Theme Settings. The new UI will also be used for Gravity Forms Conversational Forms add-on.

Export Entries
When the Image Hopper Post Image field is added in a CSV export of your entries it will include the full URL to the original image, the title, caption, and description separated by a spaceship operator (|:|).
Mergetags
The Image Hopper Post Image field supports the exact same merge tags as the standard Post Image field:
- {IH Post Image:2} – Displays the full URL to the image
- {IH Post Image:2:title} – Displays the image metadata Title
- {IH Post Image:2:caption}– Displays the image metadata Caption
- {IH Post Image:2:description}– Displays the image metadata Description
Note: change 2 in the tags above to the correct field ID of the Post Image field.
Notification Attachments
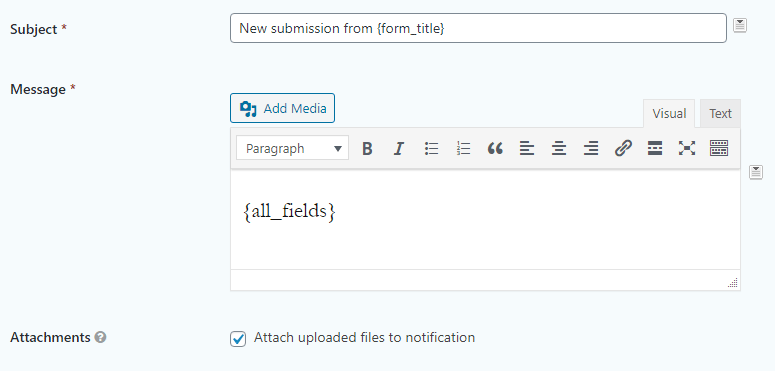
You can choose to include the uploaded Image Hopper images as attachments in your Notification emails. To enable, go to your Notification setting and enable the Attach uploaded files to notification option.
Note: this feature does not apply to the Post Image Image Hopper field.
Pay attention to how many Image Hopper fields you have in the form and what the Maximum File Size setting is for each field. Many email providers have a conservative attachment size limit, so it’s best to keep the total size under 10MB. As an example, if you had two Image Hopper fields in your form, you’ll want to set the Maximum File Size to 5MB for each field so you don’t exceed 10MB total.
Browser Support
The Image Hopper field makes use of a progressive enhancement strategy to support a wide range of modern browsers, offering more features to modern browsers who support it. For example, older browsers may not support the dropping of directories, pasting files, or external links. While browsers that do support these features will have them automatically enabled.
The following browsers and devices can successfully use Image Hopper for uploads:
Desktop
- Firefox 60+
- Chrome 61+
- Safari 10.1+
- Microsoft Edge 18+
- Opera 48+
Mobile
- Safari iOS 10.1+
- Chrome for iOS
- Firefox for iOS
- Chrome Android
- Firefox Android
Assistive Technology
- Safari with VoiceOver
- Chrome with VoiceOver
- Chrome with NVDA
- Firefox with NVDA
Add-ons Support
Gravity Forms has a rich first- and third-party add-on ecosystem, and ensuring you can use Image Hopper with all your favourite add-ons is a high priority for us. We’ve support for the following:
Gravity PDF
Gravity PDF is a popular PDF-generation plugin for Gravity Forms (and our sister product), and Image Hopper is natively supported in the Core (free templates) and Universal PDFs. To prevent PDF-generation issues when displaying images, we recommend adjusting the Image Hopper downscale and quality settings. This will keep the image file size lower, so you can still send the PDFs as email attachments (many mail servers have an attachment size limit, some as low as 10MB).

Pro Tip: if you limit the Image Hopper field to 1 image you can use the {Field Name:2:raw} merge tag in the Background Image PDF setting (available in the Template section of some PDF templates) to use the uploaded image as a full-page background. Cool, eh!?
Image Grid
To create multi-column image grids within your Gravity PDFs, use Image Hopper fields in your Gravity Forms. Add the following CSS Ready Classes to the Custom CSS Class field, located under the Appearance tab in the field’s settings:
- 2 Columns:
gf_list_2col - 3 Columns:
gf_list_3col - 4 Columns:
gf_list_4col - 5 Columns:
gf_list_5col

Applying these classes will automatically arrange uploaded images into the specified grid layout within your generated PDFs.
Previewer Add-on
The Gravity PDF Previewer add-on allows generated documents to be viewed on screen before the form is submitted. Image Hopper is fully supported, either on the same page as the Previewer or on an earlier page in the form.
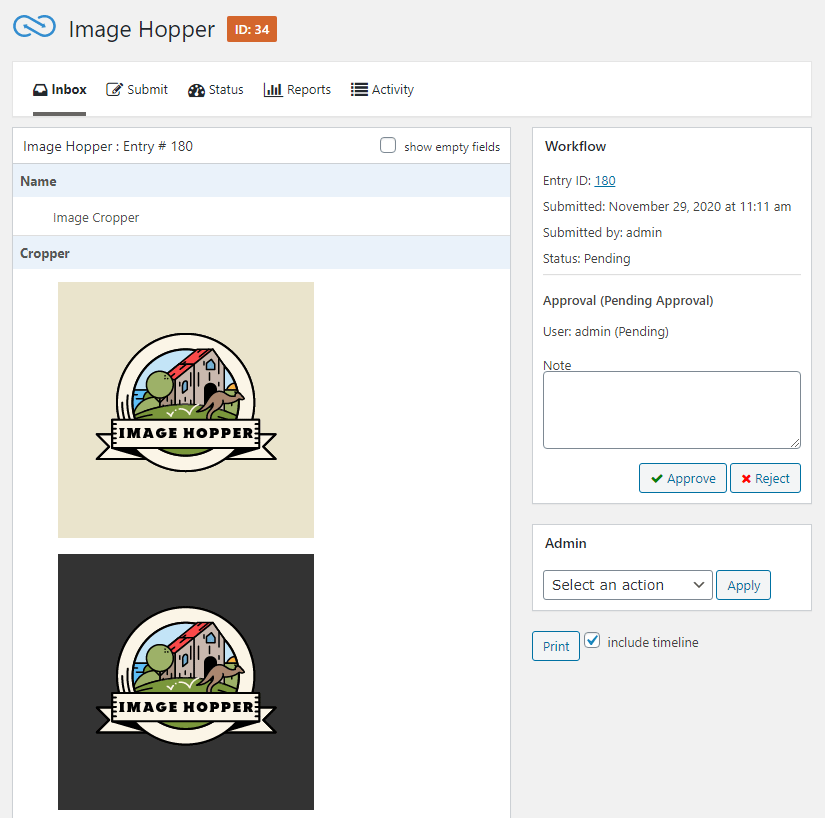
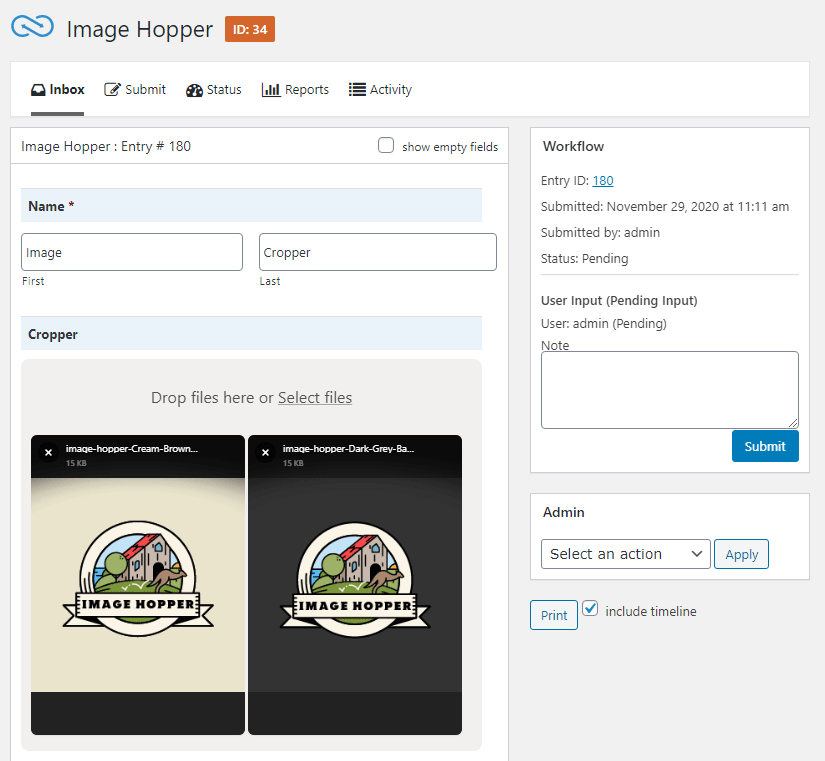
Gravity Flow
Gravity Flow is the best way to build automated business processes into your WordPress website, and Image Hopper natively supports the User Input and Approval Steps (both the WordPress Admin Inbox and the [gravityflow page="inbox"] shortcode methods). The merge tags will also be processed and used anywhere Gravity Flow accepts them, including Notifications and the Outgoing Webhook step.
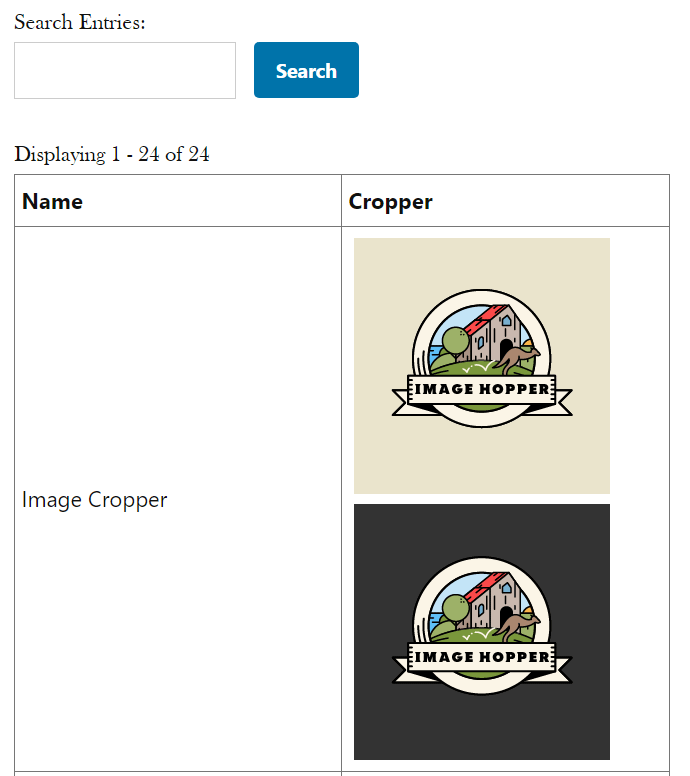
GravityView
GravityView is a powerful page builder that uses Gravity Forms data for the source. Image Hopper is fully supported in the Listing / Table Views, and on the Multiple Entries, Single Entry, and Edit Entry View pages.
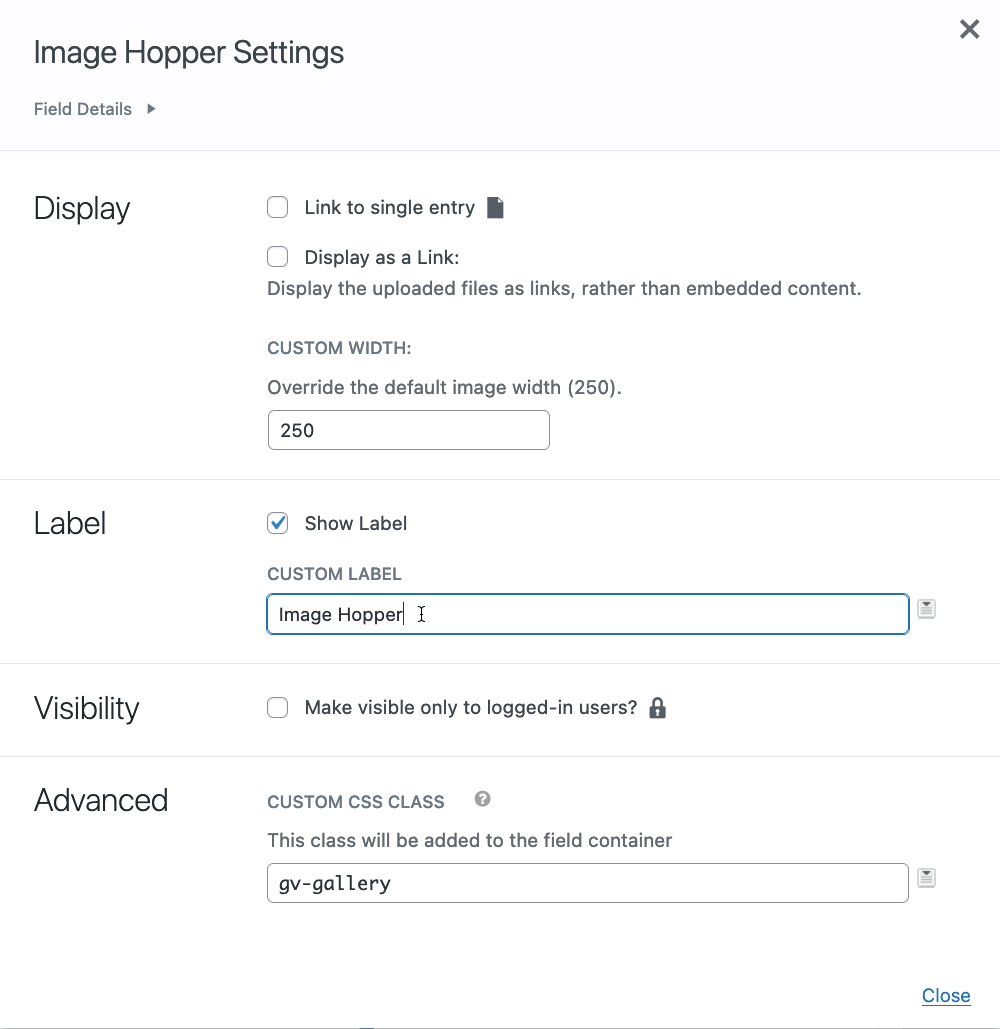
When configuring the Image Hopper fields in your Views, you will have the same settings and functionality that Upload fields have. This includes setting the default image width, displaying links to the files instead of the images themselves, or using the gv-gallery CSS class to automatically create a lightbox gallery.
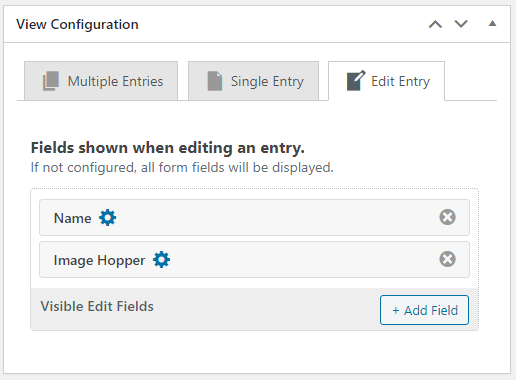
Editing is supported on both the standard Image Hopper field and the Post Image fields in GravityView. If the Image Hopper Post Image has been set as a Featured Image, GravityView will automatically update the linked Post when updated.
From Image Hopper 2.13+ the IH field can be used in the conditional logic for GravityView’s Advanced Filtering add-on.

GravityView Import Entries

GravityView’s Gravity Forms Import Entries Add-On is a useful tool that makes it easier to import/migrate Gravity Forms entries between sites. Image Hopper is fully supported, which means that image URLs in CSV exported entries are seamlessly converted into ready-to-view images (provided those image URLs can be accessed over HTTP(S) by the web server).
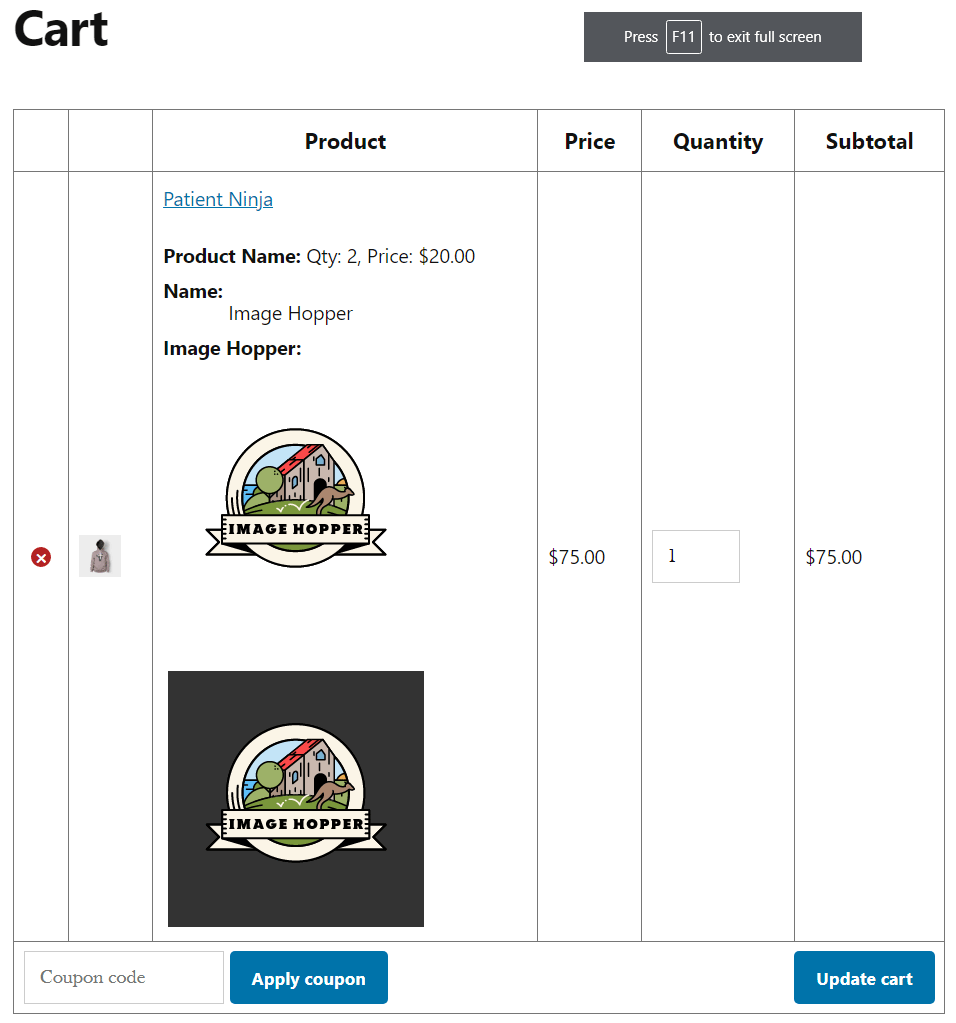
WooCommerce Gravity Forms Product Add-on
NOTE: Due to a bug in the WooCommerce checkout block, images will not be displayed. To show them in your cart, you’ll need to use the “cart” shortcode for now. For instructions, please refer to the WooCommerce Shortcodes documentation.
The Woo Gravity Forms add-on (for short) connects WooCommerce and Gravity Forms together to build advanced product configuration forms. The Image Hopper plugins works seamlessly when used in this combination, including when a user might go back and edit the Product/Gravity Form.
Gravity Perks Nested Forms
Nested Forms is a powerful Perk created by Gravity Wiz which allows you to build repeater functionality into Gravity Forms (by linking a parent form to a nested child form) and Image Hopper is fully supported when used in the nested form.
Gravity Perk Media Library
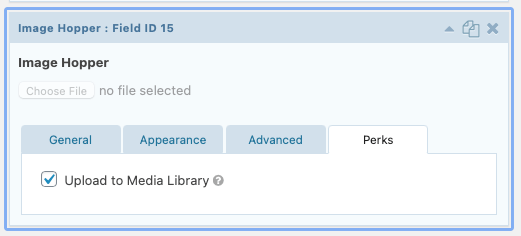
The Media Library perk from Gravity Wiz is supported in standard Image Hopper fields, and you can easily enable this functionality via the Perks tab in the Form Editor. All Image Mergetags listed in the Gravity Wiz documentation is supported.
Note: this feature is not available for the Image Hopper Post Image field
Gravity Forms Advanced Post Creation
The Advanced Post Creation add-on allows you to use any field type in your form to create Posts, Pages, or Custom Post Types with ease. Image Hopper integrates natively with this add-on and allows you to add the standard Image Hopper field images to the Media Library. You can also set a Featured Image and the first image uploaded to Image Hopper will be used.
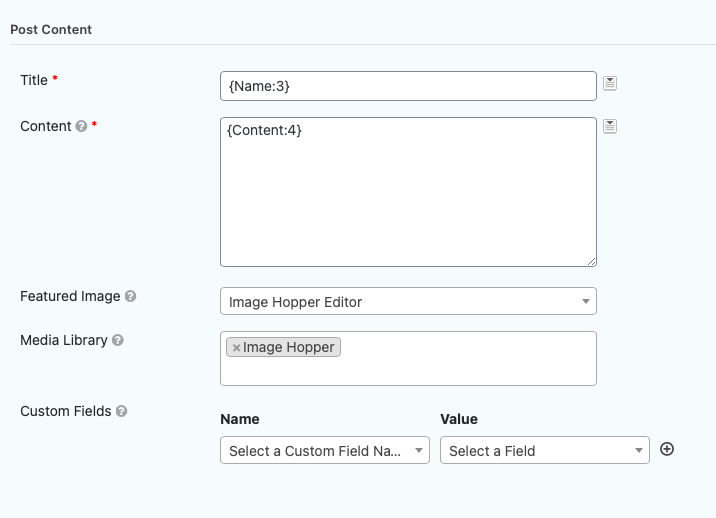
If you reference the Image Hopper field in the Post Content or Featured Image, those images will automatically be added to the Media Library.
Image Hopper also supports the {apc_media} Mergetag, so you can get the URL or IDs of the images uploaded to the Media Library. You can use the {apc_media} Mergetag in the Content area or Custom Fields. This can be very useful if you want to display a gallery of Image Hopper images in your post:
[gallery ids="{apc_media:2:ids}"]Note: the Advanced Post Creation plugin doesn’t support Gravity Forms Post fields, which includes the Image Hopper Post Image field type.
Gravity Forms + Custom Post Types
The Image Hopper Post Image field fully supports the use of the Gravity Forms + Custom Post Types plugin, which allows you to change the standard Post type used for the Post fields to a custom post type of your choosing.
Gravity Forms Dropbox
The Image Hopper field (not the Post Image field) can be combined with Gravity Forms Dropbox add-on to automatically off-load images to your Dropbox account when a new form submission is completed. When configuring the Dropbox feed either choose the All File Upload Fields option, or specifically select an Image Hopper field to offload uploaded images.
Gravity Forms includes a number of useful filters to customize this configuration to your liking, including:
- gform_dropbox_folder_path – Override the Dropbox destination folder
- gform_dropbox_file_name – Override the filename before the image(s) are uploaded to Dropbox
Note: the Dropbox add-on will only off-load images during form submission. When you edit an entry, newly uploaded (or edited) images will not be uploaded. While there are plugins available to trigger feeds when editing entries, Dropbox is currently incompatible with them as it invalidates the links to existing offloaded images when the feed is rerun.
Gravity Forms Zapier
Image Hopper has enhanced support for Gravity Forms Zapier add-on (4.1.1+) and provides human-friendly, decoded image data to Zapier for use with your zaps. The standard Image Hopper field will pass along a comma-separated list of image URLs and a separate array of URLs, while the Post Image Hopper field will include the URL, Title, Caption, Description, and Alt information as separate content.
Gravity Forms User Registration Add-on
Image Hopper natively supports the Gravity Forms User Registration Add-on when using the standard Image Hopper field so that you can easily store the uploaded image URL(s) in the user metadata (the post Image Hopper field is not supported).
When using the “Update” feed, if you map an Image Hopper field to a user meta key the image will be seamlessly hydrated and then saved back to the user meta on form submission.
Image Hopper natively supports a few popular local avatar plugins so users can manage their profile using the User Registration add-on. These include:
- Simple Local Avatars: use the meta key
simple_local_avatarwith an Image Hopper field - WP User Avatars: use the meta key
wp_user_avatarswith an Image Hopper field - Basic User Avatars: use the meta key
basic_user_avatarwith an Image Hopper field
When used in combination with one of the above-mentioned plugins, the image in the first position of an Image Hopper field will be used as the user avatar (no matter how many images are uploaded).
Other avatar plugins require images to be uploaded to the media library before saving the media ID to the user meta and are not currently supported.
Slim Image Cropper
The Slim Image Cropper for Gravity Forms plugin has been discontinued by the original developer and Image Hopper is the recommended replacement. Image Hopper has many of the same features as Slim Image Cropper (and even surpasses it in many areas), but it doesn’t have 100% feature parity.
Feature Parity
This is a list of features both Slim Image Cropper and Image Hopper support:
- Responsive and beautifully animated
- Correctly handles device orientation
- Very fast
- Easy to Configure
- High Quality User Experience
- Drag and Drop
- Resize images automatically
- User can adjust the crop and rotation (requires Advanced Image Editor to be enabled)
- Define max file upload size
- Define JPEG compression ratio
- Define required input image type
- Customize output image size
- Supports touch interaction on mobile devices
- Validate images before upload
- Multiple fields per form
- Post Image field type
- Minimum image dimensions
- Image quality warning (like the minimum image dimensions, but still allows the image to be uploaded)
Not Supported
This is a list of features Slim Image Cropper supports, but Image Hopper doesn’t:
- Set image ratio – you can set the image size with the Crop to Dimensions option enabled to achieve similar results
- Force output format (either JPEG or PNG)
New Features
This is a list of features Image Hopper supports, but Slim Image Cropper doesn’t:
- Upload multiple images to the same upload field (you are not limited to one image per field) and then reorder those images
- Attach uploaded images to Notification emails
- Support for .webp and .heic (converted to .jpeg) images
- Deep integration with the Gravity Forms ecosystem, including native support for popular add-ons like Gravity PDF, GravityView, Gravity Flow, Gravity Perks Nested Forms, Gravity Perks Media Library, Gravity Forms User Registration, Gravity Forms Advanced Post Creation, Gravity Forms + Custom Post Types, and the WooCommerce Gravity Forms add-on.
- Intuitive Settings – Image Hopper takes a convention over configuration approach to using the plugin, meaning it is easier to setup and configure.
Migrate from Slim Image Cropper
These are the steps you should take after you deactivate Slim Image Cropper and install and activate Image Hopper:
- In your admin area, navigate to the Gravity Forms editor for a form that contains a Slim Image Cropper field
- Add a new Image Hopper field below each of your Slim Image Cropper fields, and configure accordingly. Because Image Hopper can support multiple images per field, you may be able to consolidate multiple Slim Image Cropper fields.
- Leave your existing Slim Image Cropper fields in the form (Image Hopper will automatically hide the Slim and Slim Post fields from your end user, but still display the images in your admin area).
- Save your Gravity Form
- Test that you can now upload images using Image Hopper and that you don’t see the Slim Image Cropper fields while filling out the form.
- Verify you can see the Image Hopper images on the Entry Details page for your newly-submitted test entry
- Verify that you can still see the Slim Image Cropper images on the Entry Details page for older entries
- Repeat step 1-7 for each of your Gravity Forms
Translations
Image Hopper ships with the following translations out of the box:
- English (en_US)
- French (fr_FR)
- Spanish (es_ES)
- German (de_DE)
- Russian (ru_RU)
- Hebrew (he_IL)
- Chinese, Simple (zh_CN)
If you’d like your language to be supported natively, please get in touch and let us know. The more demand for a specific language the greater the chance of it getting added.
Self-Translation
You can use the free Loco Translate plugin to write your own translations specifically for Image Hopper. The Gravity PDF team have an excellent guide which shows you how to go about translating a plugin. Just substitute Gravity PDF for Image Hopper when completing the steps.
If you prefer to generate a PO/MO file for your chosen language using a tool like POEdit, you can find the POT language file at /languages/image-hopper.pot in the plugin zip file.
Developers
This section covers useful code examples to customize Image Hopper in a variety of different ways.
CSS
This section covers useful CSS snippets that change the look and feel of Image Hopper. The simplest way to use the snippets is by adding the CSS to the Customizer.
Image Drop Zone
/* Change the drop zone background color */
.filepond--panel-root {
	background-color: #C1F1C1; /* teal */
}

/* Remove the drop zone background color */
.filepond--panel-root {
	background-color: inherit; /* no background */
}

/* Remove the drop zone background color and add a border */
.filepond--panel-root {
	background-color: inherit; /* no background */
        border: 1px solid #CCC;
}
Image Columns
/* Force the images to display in a one column layout, no matter the device */
.filepond--root[data-size="small"] .filepond--item,
.filepond--root[data-size="medium"] .filepond--item,
.filepond--root[data-size="large"] .filepond--item {
    width: 100%;
}

/* Force the images to display in a two column layout, no matter the device */
.filepond--root[data-size="small"] .filepond--item,
.filepond--root[data-size="medium"] .filepond--item,
.filepond--root[data-size="large"] .filepond--item {
    width: calc(50% - .5em);
}

/* Force the images to display in a three column layout, no matter the device */
.filepond--root[data-size="small"] .filepond--item,
.filepond--root[data-size="medium"] .filepond--item,
.filepond--root[data-size="large"] .filepond--item {
    width: calc(33.33% - .5em);
}
Image Meta
/* Disable the image filename and size */
.filepond--file-info {
	display: none;
}
Javascript Actions/Filters
image_hopper_filepond_config(config, FilePond, $form, currentPage, formId, fieldId, entryId, files, fileInput)
This filter allows you to manipulate the FilePond instance configuration. FilePond is the library used to handle the image uploading functionality, so being able to change how it works based on your needs can be very useful.
config {object} – The FilePond configuration object, which accepts all the properties listed in the FilePond instance documentation. FilePond {object} – The FilePond public API object. $form {object} – A jQuery object matching the encompassing Gravity Forms <form> element currentPage {int} – The current page number of the Gravity Forms form. formId {int} – The Gravity Forms form ID fieldId {int} – The Image Hopper field ID entryId {int} – The Gravity Forms entry ID (if one exists) files {array} – A list of the files already uploaded at the time of initialisation fileInput {object} – The <input type="file"> object currently being Image Hopper’d
Examples
Limit image file types to JPG, PNG, and GIF only (preventing BMP, WEBP, and HEIC image uploads):
gform.addFilter('image_hopper_filepond_config', function(config, FilePond, $form, currentPage, formId, fieldId, entryId, files, inputField) {
   config.acceptedFileTypes = ['image/png', 'image/jpeg', 'image/gif']

   return config
} )
Disable instant upload on image selection/drop:
gform.addFilter('image_hopper_filepond_config', function(config, FilePond, $form, currentPage, formId, fieldId, entryId, files, inputField) {
   config.instantUpload = false
   return config
} )
Disable image reordering:
gform.addFilter('image_hopper_filepond_config', function(config, FilePond, $form, currentPage, formId, fieldId, entryId, files, inputField) {
   config.allowReorder = false
   return config
} )
If you don’t have the Image Editor add-on enabled this code will allow you to automatically add a text watermark to the bottom-left of every uploaded image (see the editor docs for the alternate snippet):
gform.addFilter('image_hopper_filepond_config', function (config, FilePond, $form, currentPage, formId, fieldId, entryId, files, inputField) {
  FilePond.setOptions({
    fileMetadataObject: {

      // The `markup` property is how we define our watermark
      markup: [
        [
          'text',
          {
            top: '95%',
            left: '3%',
            text: new Date().toLocaleDateString(), // to use the server time, create a hidden GF field with a default value of {date_mdy} and then get its value with `document.getElementById('input_formID_fieldID').value`
            textAlign: 'left',
            fontColor: '#000000',
            fontSize: '20pt',
          }
        ],
      ]
    }
  })
  config.imageTransformOutputQualityMode = 'always'
  return config
})
If you don’t have the Image Editor add-on enabled this code will allow you to automatically add an image watermark to the bottom-right of every uploaded image (see the editor docs for the alternate snippet):
gform.addFilter('image_hopper_filepond_config', function (config, FilePond, $form, currentPage, formId, fieldId, entryId, files, inputField) {
  FilePond.setOptions({
    fileMetadataObject: {

      // The `markup` property is how we define our watermark
      markup: [
        [
          'image',
          {
            right: '10px',
            bottom: '10px',
            width: '150px',
            height: '150px',
            src: 'https://example.com/wp-content/uploads/2020/12/watermark.png', // set full URL to image uploaded to your media library. Use a transparent PNG for transparency
            fit: 'contain'
          }
        ],
      ]
    }
  })
  config.imageTransformOutputQualityMode = 'always'
  return config
})
Automatically add an image (hosted on the same domain as the form) to Image Hopper on load:
gform.addFilter('image_hopper_filepond_config', function(config, FilePond, $form, currentPage, formId, fieldId, entryId, files, inputField) {
   if(files.length > 0) {
      return config;
   }

   config.files = [
        {
                source: 'https://imagehopper.tech/wp-content/uploads/2021/04/example.png', //change this to the URL of your image
                options: {
                        type: 'input' // change 'input' to 'local' if you do not want the image auto-uploaded
                }
        }
   ]
   return config
} )
You can also tap into a multitude of events that are triggered when a user interacts with Filepond:
gform.addAction('image_hopper_post_filepond_create', function(filePond, $form, currentPage, formId, fieldId, entryId, files, field, filePondObject) {
   // get the Filepond element
   var pond = jQuery('#field_' + formId + '_' + fieldId).find('.filepond--root')[0]

   // listen for an image being added
   pond.addEventListener('FilePond:addfile', function(e) {
      console.log('New file added', e.detail.file)
   })
})
Usage
While you could create a separate JavaScript file and enqueue it when your desired Gravity Forms form is displayed, it’s far easier to add an HTML field to your form and wrap the filter in <script type="text/javascript"></script> tags.

Additional Info
You can manipulate any of the properties listed in the FilePond documentation, but we recommended you steer clear of the following (so you don’t break the core functionality, or use unsupported features):
namestatuselementservercaptureMethodallowReorder
PHP Actions/Filters
Along with pre-populating images into Image Hopper fields using Javascript, this can also be done using PHP. When using the PHP pre-populate feature, unless the image is edited or removed by the user Gravity Forms won’t reprocess it on form submission (this is akin to passing the “local” option in the Javascript version). Use the Javascript alternative above with the “input” option to ensure the image is processed with every form submission.
add_action( 'gform_pre_render', function( $form ) {
	/* Only run on form ID 2 */
	if ( (int) $form['id'] !== 2 ) {
		return $form;
	}

	if ( ! isset( \GFFormsModel::$uploaded_files[ $form['id'] ] ) ) {
		\GFFormsModel::$uploaded_files[ $form['id'] ] = [];
	}

	/* Pre-populate Image Hopper field ID#1 with images */
	\GFFormsModel::$uploaded_files[ $form['id'] ]['input_1'] = [
		[
			'temp_filename'     => '',
			'uploaded_filename' => 'https://example.com/path/to/image1.jpg',
		],

		[
			'temp_filename'     => '',
			'uploaded_filename' => 'https://example.com/path/to/image2.jpg',
		],

		[
			'temp_filename'     => '',
			'uploaded_filename' => 'https://example.com/path/to/image3.jpg',
		],
	];

	/* Pre-populate Image Hopper field ID#2 with images */
	\GFFormsModel::$uploaded_files[ $form['id'] ]['input_2'] = [
		[
			'temp_filename'     => '',
			'uploaded_filename' => 'https://example.com/path/to/image1.jpg',
		],
	];

	return $form;
} );
By default, all uploaded images to a particular form are stored in the directory structure /wp-content/uploads/gravity_forms/{$form_id}_{$form_id_hash}/{$year}/{$month}/. This means images from multiple entries can be stored in the same directory on the server. If a user uploads an image with the same name as an existing image on the server, Gravity Forms will automatically suffix the filename with an incremental number until a unique name is found. For some users renaming the images isn’t ideal and they would prefer to store each entry’s images in a separate folder on the server. For that you can use this snippet:
add_filter( 'gform_upload_path', function( $path_info, $form_id ) {
	$unique_id = rgpost( 'gform_unique_id' );

	$hash  = json_encode( $_SERVER );
	$state = wp_hash( crc32( $unique_id . $hash ) );

	$path_info['path'] = WP_CONTENT_DIR . "/files/$form_id/{$state}/";
	$path_info['url']  = WP_CONTENT_URL . "/files/$form_id/{$state}/";

	return $path_info;
}, 10, 2 );
Image Hopper will display the uploaded images on the Entry Details page. If you prefer to output a list with links to the images instead, you can use this snippet:
add_filter( 'gform_entry_field_value', function ( $value, $field, $entry, $form ) {
	if ( $field->type === 'image_hopper' ) {
		$field->set_modifiers( [ 'url', 'raw' ] );

		$files = $field->get_value_merge_tag( '', '', $entry, $form, '', $entry[ $field->id ], false, false, 'text', false );
		$files = explode( ', ', $files );
		$html  = '<ul>';
		foreach ( $files as $file ) {
			$html .= '<li><a href="' . esc_url( $field->get_download_url( $file ) ) . '">' . wp_basename( $file ) . '</a></li>';
		}

		$html .= '</ul>';

		return $html;
	}

	return $value;
}, 10, 4 );
Usage
You can add PHP actions/hooks to your active theme’s functions.php file, or use the Code Snippets plugin to create and store your snippets.