
The Image Hopper field is a versatile Gravity Forms field available under the Advanced section of the form editor. It allows you to add powerful image upload capabilities to your forms with client-side downscaling, cropping, and optional in-browser editing.
At a glance
- Upload multiple images to a single field or use multiple Image Hopper fields per form
- Automatically downscale images to fit width/height constraints
- Optionally crop images to exact dimensions, with automatic upscaling
- Set maximum file size, maximum number of images, and minimum image dimensions
- Reorder uploaded images with drag and drop or keyboard controls
- Support for JPG, GIF, PNG, BMP, HEIC (auto-converted to JPG), WebP, and AVIF formats
- Compatible with Gravity Forms Save and Continue, notifications, exports, and multi-page forms
- Works with Gravity Forms Themes and Conversational Forms add-on
For a complete inventory of every capability the Image Hopper field supports, see the Features page.
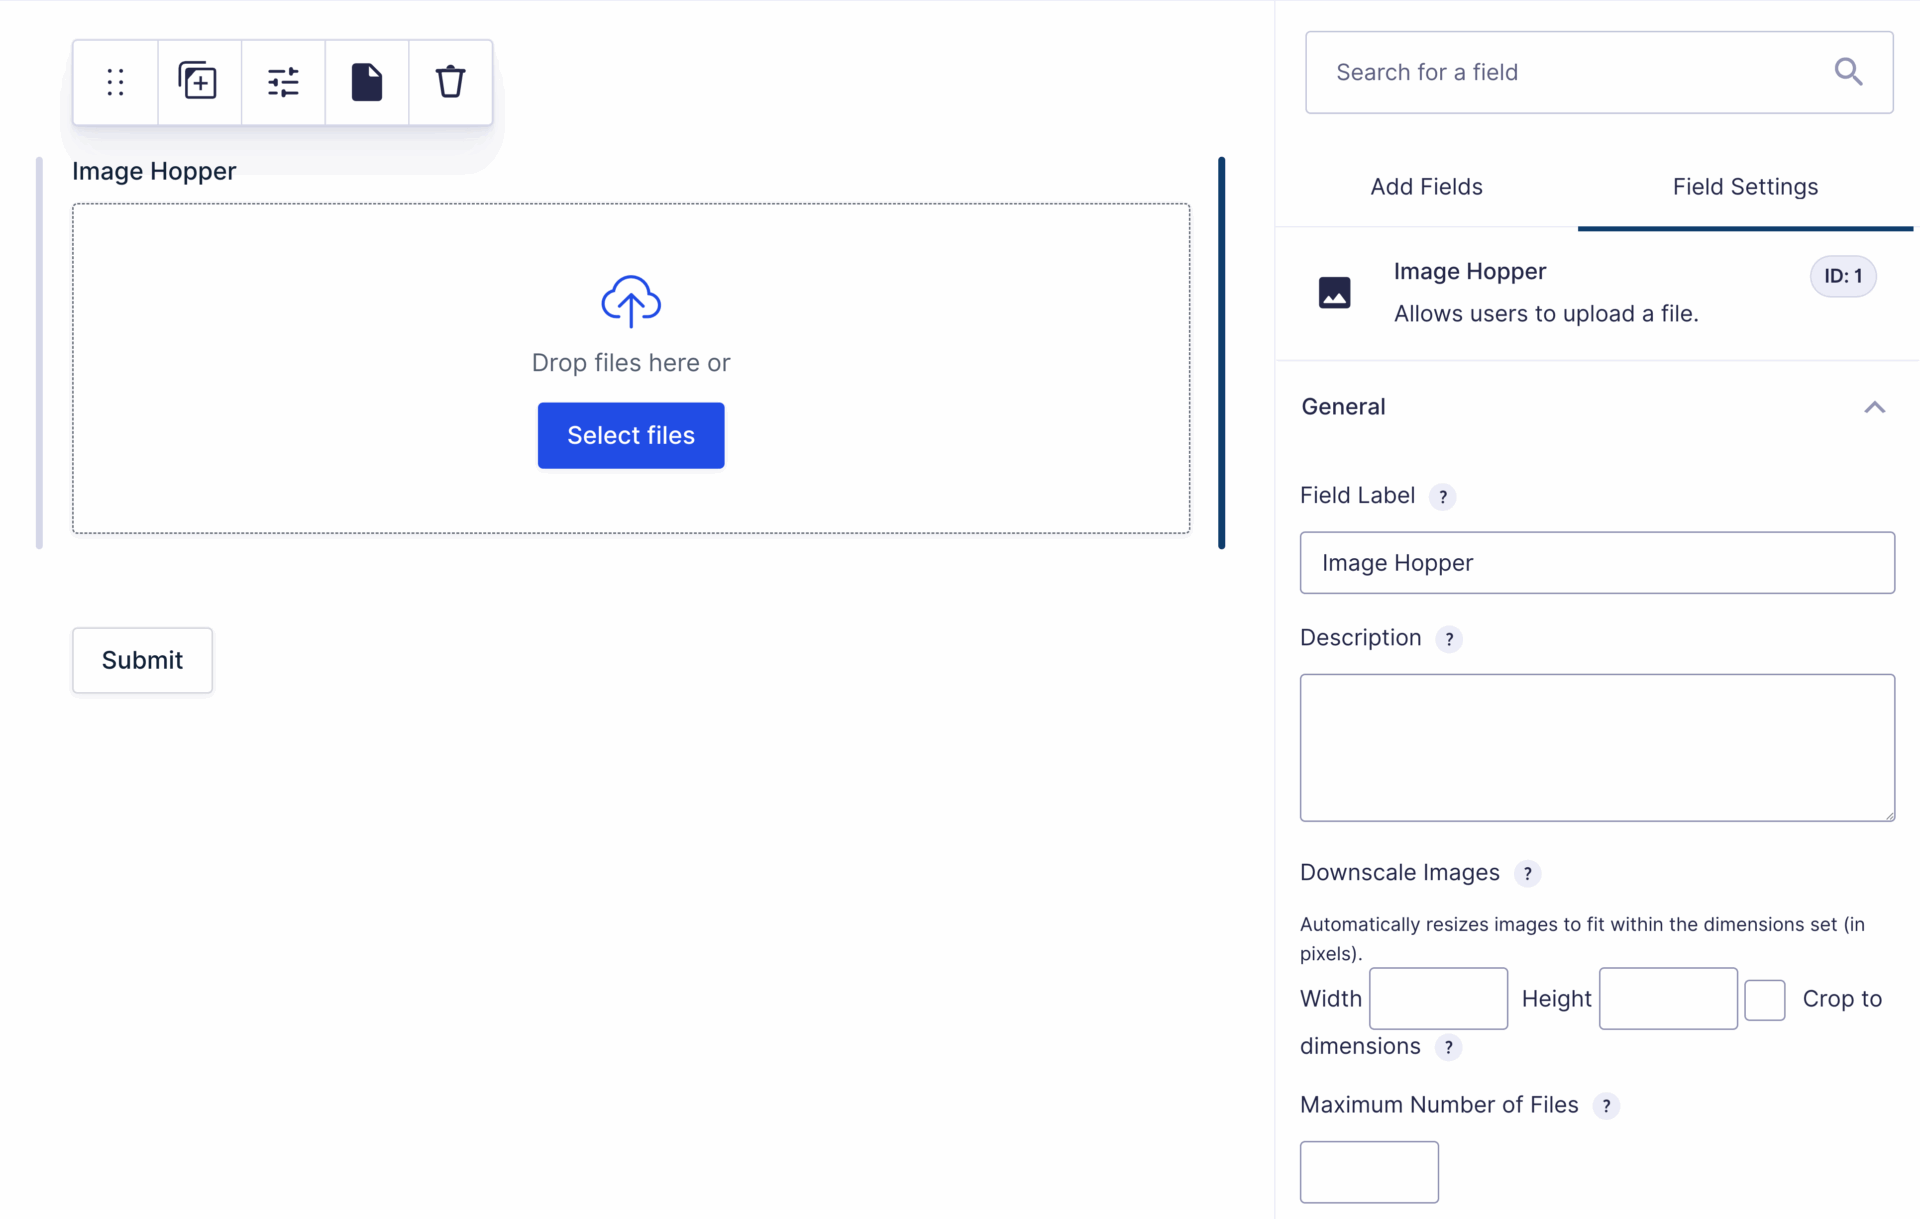
Field Settings
The following settings are available for the Image Hopper field. Each row in the table links to the full description below.
| Setting | Description |
|---|---|
| Downscale Images | Automatically scale large uploads down to fit a width and height, in the user’s browser before upload. |
| Crop to Dimensions | Resize and crop uploads to exact dimensions, with or without the Image Hopper Editor. |
| Maximum Number of Files | Limit how many images can be uploaded to a single field. |
| Output Quality | Control the compression quality of JPG/JPEG output (0–100). |
| Maximum File Size | Set a maximum upload size in megabytes (measured after downscaling). |
| Minimum Image Size | Block uploads that are smaller than a width and height you specify. |
| Minimum Image Size Warning | Warn the user about small images while still allowing the upload. |
| Upscale to Crop Dimensions | Scale small images up to match the crop dimensions (Crop to Dimensions only). |
| Rename Upload | Automatically rename uploads and optionally place them in a subfolder. |
Downscale Images
With modern phones and cameras producing higher quality images, users are more likely to be uploading huge images to your server and this can easily become a storage, bandwidth, and backup nightmare. While the standard File Upload field in Gravity Forms allows you to set a Maximum File Size, it puts the burden on the user to optimize the images prior to upload. With Image Hopper, all you need to do is set a conservative downscale width/height and the image(s) are automatically processed in the user’s browser before uploading. It’s a win-win for everyone involved.
If a user uploads an image that is already below your downscale size it will not be automatically scaled up (see Upscale to Crop Dimensions).
Crop to Dimensions
By default, the Downscale Images setting respects an image aspect ratio. If you instead want to ensure the image is the exact size you’ve set, enable the Crop to Dimensions setting and those images are automatically resized and cropped to suit. If an image is smaller than the crop dimensions it won’t get processed automatically. But you can set a Minimum Image Size that matches your crop dimensions to prevent users uploading small images, or enable the Upscale to Crop Dimensions setting to force uniformity on all uploads (be aware upscaling images affects the overall image quality).
This feature can be enabled with or without the Image Hopper Editor. When the Image Editor is disabled, the image is automatically resized and cropped to the set dimensions, using the middle of the image as the crop centre point. If the Image Editor is enabled, the user can adjust the positioning of the image in relation to the fixed crop area to change the focal point.
Maximum Number of Files
You can specify the maximum number of images that can be uploaded to an Image Hopper field. You can leave this setting blank for unlimited files, just bear in mind the actual number of files permitted may be limited by your server’s specifications and configuration.
If only one image is allowed on the field, the image is automatically displayed at full width (up to a maximum height of 800px) inside the Image Hopper container.
Output Quality
Optimize images even more by setting the output quality of JPG/JPEG images. Set to 0 for the worst possible quality, and 100 for the best. If you don’t set a value, Image Hopper uses the browser defaults.
Maximum File Size
Specify the maximum file size in megabytes allowed for each of the files. When used in conjunction with the Downscale Images setting, the file size is checked after the image has been downscaled.
Minimum Image Size

Images smaller than the threshold you set can be prevented from being uploaded by enabling the Enable Minimum Image Size setting under the Advanced tab/section of the Image Hopper field. Set a specific threshold and Image Hopper automatically stops the uploading process if users attempt to upload images that have a width or height smaller than what you have defined.
As an example, if you set the dimensions to 500px width and 500px high and a user uploads an image that is 200x200px an error shows and the image won’t be uploaded. The same is true if a user uploaded an image that is 600px wide and 400px high. Both width and height need to be individually larger than the associated minimums you set for it to be uploaded.
Minimum Image Size Warning

If you would like to alert the user that the image they are uploading might be too small, but still allow the upload, then enable the Enable Minimum Image Size Warning setting under the Advanced tab/section and set an appropriate width and height. If a user uploads an image smaller than the threshold, the warning shows below the Image Hopper field.
Note: ensure the Downscale Image width and height is larger than the threshold you set for the minimum image size warning, otherwise all images show the warning regardless of what the original size was.
Upscale to Crop Dimensions
Located in the Advanced section of the Image Hopper field, this setting is only available if you’ve also enabled Crop to Dimensions. When toggled on, it ensures the uploaded image gets scaled up to the width and height specified in Downscale Images when it has smaller dimensions. While this does ensure all uploaded images have uniformity, this saves an image that has a noticeable drop in image quality.
Rename Upload
Located in the Advanced section of the Image Hopper field, this setting allows you to automatically rename uploads, and set the file path — which is relative to the form’s current upload directory (/wp-content/uploads/gravity_forms/{id}-{hash}/). Merge tags are supported, and you can reference the original filename using the {name} tag. If a file with the same name and extension already exists in the directory, an incremental counter is added as a suffix, until unique.
File renaming occurs during form submission, and not during the initial upload.
Valid inputs include:
{date_created:format:Y-m-d}-{name}— prefix all filenames with the year, month, and dayUploads— use a static filename. Multiple files with the same extension have a counter added (e.g.Uploads1.jpg,Uploads2.jpg,Uploads3.jpg)/{entry_id}/{name}— store individual entry uploads in separate folders, using the default filename provided by the user/{Category:2}/{date_created:format:Y}/Report-{entry_id}— organize uploads in folders by category and year, then rename with a static value and entry ID
To save uploads to a path outside of Gravity Forms default /wp-content/uploads/gravity_forms/{id}-{hash}, you need to implement the gform_upload_path filter. Be aware that secure file URLs cannot be used if you use the gform_upload_path filter.
Common Field Settings
The Image Hopper field supports many of Gravity Forms common field settings, including:
- Field Label
- Description
- Rule: Required
- Field Label Visibility
- Description Placement
- Custom Validation Message
- Custom CSS Class
- Admin Field Label
- Visibility
- Conditional Logic
For information about these common field types please refer to Gravity Forms documentation.
Form Theme
Image Hopper 2.9+ introduced support for Gravity Forms Themes, and when you select a non-default theme (like Orbital) the Image Hopper field outputs with an alternate design which integrates seamlessly with the available Theme Settings. The new UI is also used for Gravity Forms Conversational Forms add-on.

Reorder Images
Watch the reorder demo on YouTube
After images have been added to the Image Hopper field they can be reordered with a mouse or touch-sensitive device by dragging images around the screen. It’s also possible to change the order with the keyboard by gaining focus on an image and using the arrow keys or “J” and “K” keys.
Export Entries
When the Image Hopper field is included in a CSV export of your entries it includes the full URL to each image, separated by a space/comma/space ( , ). If only a single image is uploaded the separator is not included.